This was going to be a post about using COM Server activation in a WinAppSdk application to interact with Click to Do. However, since there’s currently a major regression in the dev channel of the Windows insider builds (reported here, here and here), which prevents Visual Studio from debugging any applications, that’ll have to wait. Instead, I’m going to walk through the steps I cobbled together to allow me to install prior versions of Visual Studio 2022. I’m sure that there’s probably a much nicer, easier strategy for how to install previous versions of Visual Studio 2022 but I wasn’t able to find it. For prior versions of Visual Studio (ie before VS 2022), you can use this link.
The first thing you’re going to need is the Microsoft Update Catalog. If you follow this link, you’ll end up at the catalog with “Visual Studio 2022” already entered as the search term.
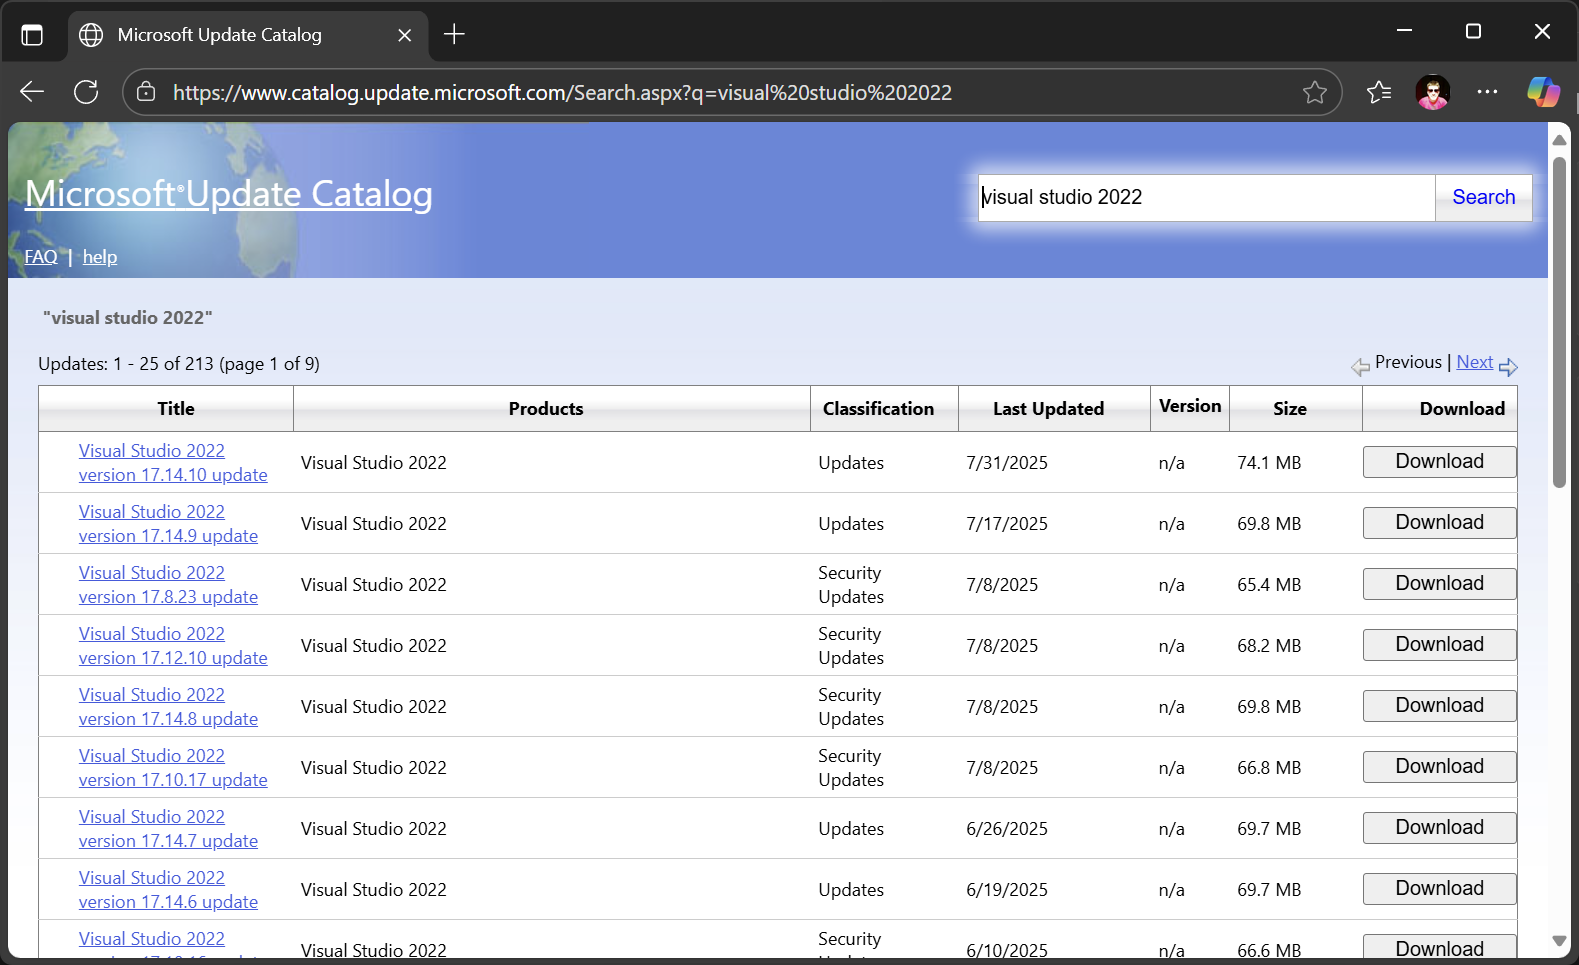
Scan the list of updates and find the version you want to install. For example, let’s install 17.14.8. Click the Download button
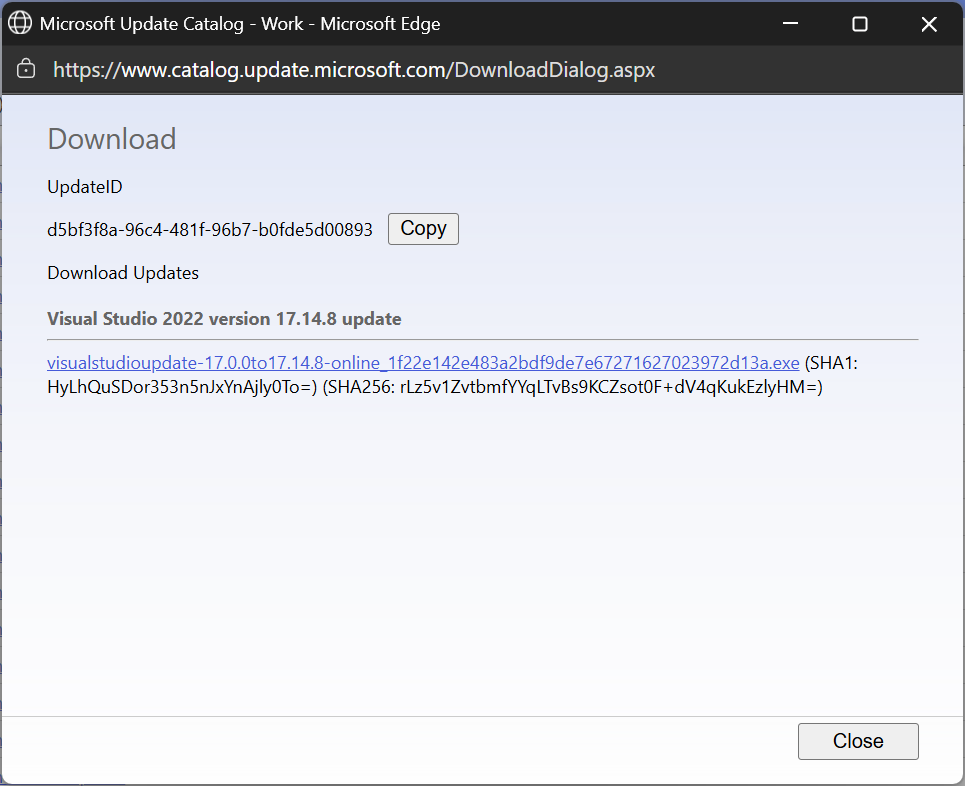
And then click the link in order to download an executable eg visualstudioupdate-17.0.0to17.14.8-online_1f22e142e483a2bdf9de7e67271627023972d13a.exe.
Ok, the next step can be a little tricky. When you run the executable, it’s going to extract the compressed contents to the Temp folder (eg C:\Users\[Username]\AppData\Local\Temp). However, once the executable has finished executing, it will clean up this folder, so you only have a few seconds to copy the extracted folder so that you can use it in the next step. For me I’ve copied the folder to C:\temp\1facaca3398aca1c021efd11ff6df750.
In order to install the version of Visual Studio 2022 you going to execute the vs_setup.exe in the extracted folder. However, the trick is that you need to tell it the location of the ChannelManifest.json file, which is alongside the vs_setup.exe in the extracted folder. Whilst it would have been super convenient if it would automatically search that folder by default, the only way I could get it to work was to setup a network share and specify that when executing vs_setup.exe.
To setup a folder as a network share, right click on the folder in Windows Explorer and open Properties. Click on the Sharing tab, and click the Share button. For simplicity (not secure!!!) I just added Everyone to the access list, and then clicked Share.

Once you’ve clicked Share, you can then right click on the shared folder and select Copy Link.
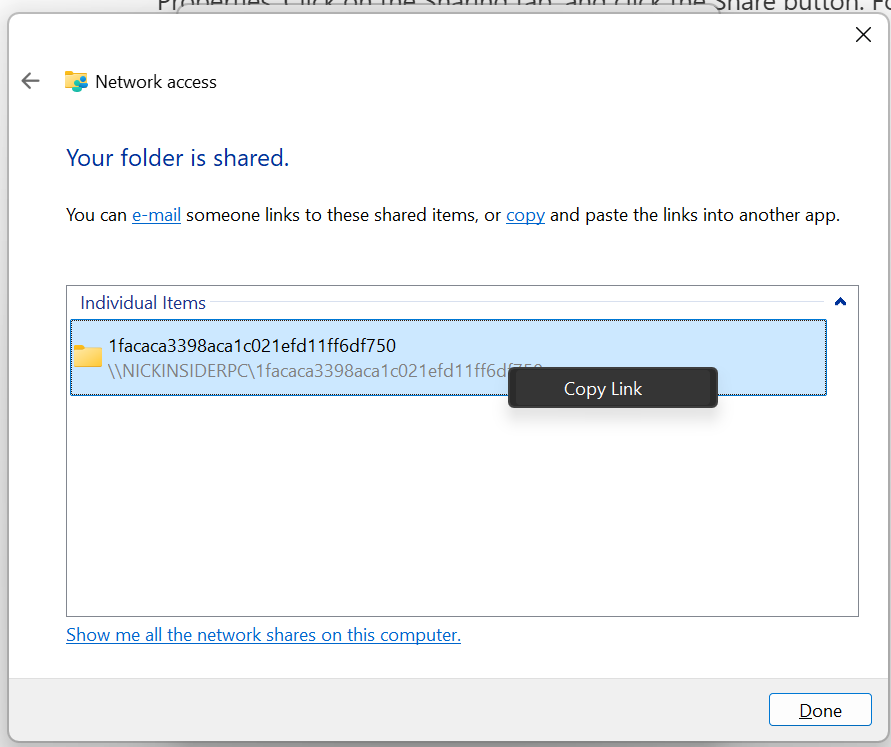
This should give you a link in the format 1facaca3398aca1c021efd11ff6df750 (file://NICKINSIDERPC/1facaca3398aca1c021efd11ff6df750). You’ll need to adjust this to include the full path to the ChannelManifest.json file eg \NICKINSIDERPC\1facaca3398aca1c021efd11ff6df750\VisualStudioUpdate-17.0.0To17.14.8-Online\ChannelManifest.json.
Now we’re in a good place to run vs-setup.exe using the following command.
vs_setup.exe install --channelURI \NICKINSIDERPC\1facaca3398aca1c021efd11ff6df750\VisualStudioUpdate-17.0.0To17.14.8-Online\ChannelManifest.json --channelId VisualStudio.17.Release --productId Microsoft.VisualStudio.Product.Professional
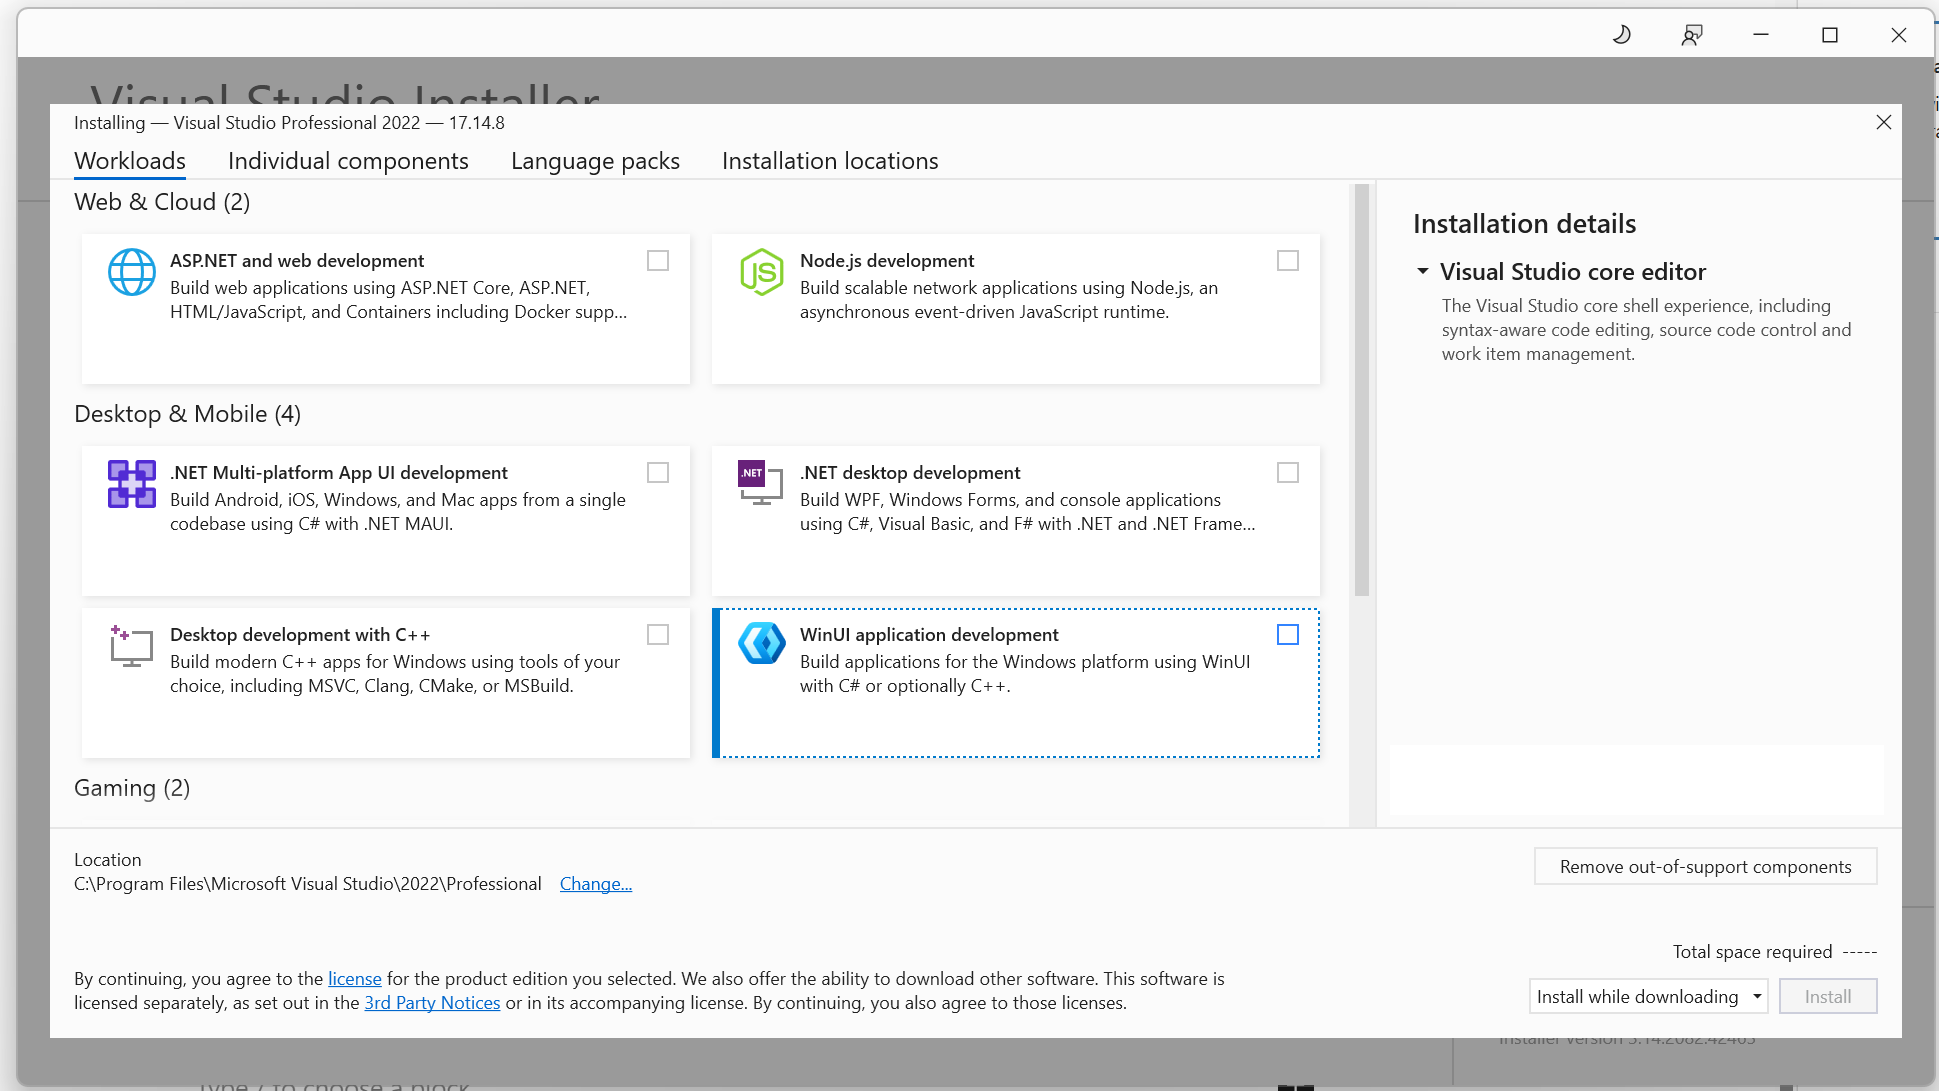
This should launch the Visual Studio installer directly into the screen where you can pick the workloads you want to install.
And there, that’s it, you’ve successfully installed a previous version of Visual Studio 2022.
If you’re working on custom Android apps like a Crunchyroll APK mod or building related tools, sometimes the latest version of Visual Studio 2022 might not be the best fit. Older versions can offer better compatibility with certain SDKs or plugins you rely on for your project. Here’s how you can install them without breaking your workflow.
You should be able to install specific versions of VS 2022 through the links provided in the following table: https://learn.microsoft.com/en-us/visualstudio/releases/2022/release-history#:~:text=Fixed%20version%20bootstrappers
Thanks Ezra – I’m not sure why this never surfaced for me when I was investigating 🙂